More
What Is The Role of Decomposers in Ecosystem? A Simple Guide
The role of decomposers in ecosystem are of great importance for the survival of every living thing, from plants to animals and microscopic creatures. The group of organisms called decomposers form the last link in the food chain.
Decomposers are like nature’s ultimate recyclers! They’re these tiny but mighty organisms that work hard to break down dead stuff, like plants and animals, into simpler bits. Think of them as the ultimate clean-up crew in ecosystems, helping to keep things tidy by breaking down old stuff into useful nutrients.
Role in Recycling Nutrients
These guys play a really cool role in nature’s big recycling program. They take all that old stuff and break it down, releasing nutrients back into the environment. It’s like they’re giving nature a makeover, turning old things into valuable elements that other living things can use to grow and thrive.
Contribution to the Biosphere
Imagine them as the magical beings behind the scenes. They transform dead things into essential elements, like carbon and nitrogen, which then get reused by plants, animals, and basically everything else in the environment. They’re like nature’s champions, making sure everything stays balanced and ready for new life to take root.
Types of Decomposers
Fungi:
Fungi, such as molds and mushrooms, are essential decomposers. Their mycelium, a network of thread-like structures, breaks down organic matter. Fungi release enzymes that digest complex compounds, aiding in the decomposition process. They thrive in diverse environments, contributing significantly to the breakdown of dead material and the recycling of nutrients.
Bacteria:
Bacteria, microscopic organisms, are prolific decomposers found virtually everywhere. They are vital in recycling nutrients from organic matter. Various bacterial species break down complex organic substances, like cellulose and proteins, into simpler forms, facilitating the return of essential nutrients to the ecosystem.
Insects:
Insects, including beetles, ants, and flies, are instrumental in the decomposition of organic matter. They accelerate the process by feeding on dead plants and animals, aiding in their breakdown. Some insects also lay eggs in decaying material, and their larvae consume and break down organic matter, aiding in nutrient recycling.
Earthworms:
Earthworms play a crucial role in soil decomposition. Their constant movement and feeding habits help break down organic matter in the soil. As they burrow and consume decaying plant material, they enhance soil aeration and nutrient availability, contributing significantly to the breakdown of organic matter and nutrient cycling in ecosystems.
Decomposers in Nutrient Cycling
Nutrient Breakdown Process:
Decomposers play a vital role in the breakdown of organic matter. During decomposition, microbes like bacteria and fungi break down complex molecules into simpler forms. Enzymes released by decomposers break down dead plants and animals into essential elements, such as carbon, nitrogen, and phosphorus, making these nutrients available for reuse by living organisms.
Nutrient Reintroduction:
Decomposers contribute to the reintroduction of nutrients into the environment. As they break down organic matter, nutrients are released into the soil, water, and air. These nutrients become available to plants, supporting their growth and serving as a vital source for producers in the ecosystem. This process of nutrient recycling ensures a continuous flow of essential elements, sustaining life in various ecosystems.
Importance Of Decomposers in Ecosystems
Soil Enrichment:
Decomposers play a crucial role in soil enrichment by breaking down organic matter. As they decompose dead plants and animals, they release nutrients into the soil, enhancing its fertility. This process enriches the soil with essential elements like nitrogen, phosphorus, and potassium, providing a conducive environment for plant growth.
Plant Growth:
Decomposers indirectly aid in plant growth by recycling nutrients. The nutrients released by decomposers from organic matter are absorbed by plant roots, facilitating their growth and development. These nutrients act as vital components for various metabolic processes within plants, ensuring their health and vigor in the ecosystem.
Waste Management:
Decomposers assist in waste management by breaking down dead organic material. They help in the decomposition of organic waste, including fallen leaves, dead animals, and plant debris. This natural recycling of organic matter prevents the accumulation of waste, maintaining a balanced ecosystem and preventing potential environmental hazards.
Impact on Biodiversity
Creation of Habitat:
Decomposers significantly contribute to creating habitats for various organisms. Their activity in breaking down organic matter and recycling nutrients generates suitable environments for other species. By transforming decaying material into nutrient-rich substrates, they foster diverse microhabitats, offering niches for numerous organisms to thrive.
Influence on Food Webs:
Decomposers play a fundamental role in sustaining food webs. Their activity at the base of the food chain provides nutrients essential for primary producers. These nutrients are then passed through the trophic levels, supporting the growth of herbivores, carnivores, and omnivores. Consequently, decomposers indirectly influence the stability and structure of ecosystems by facilitating energy flow and nutrient cycling within food webs.
Human Interaction with Decomposers
Agriculture:
In farming, these decomposers are like nature’s secret helpers! Farmers use special organisms like bacteria and fungi to break down things like compost and animal poop. You know what’s cool? It’s like these little guys turn all that yucky stuff into super nutrients for the soil. So, the soil becomes super healthy, helping plants grow better and giving farmers awesome crops.
Waste Treatment:
When you throw your kitchen scraps or other organic stuff into the compost bin, these tiny microbes get to work. They break down all that stuff and turn it into this amazing, rich soil called compost. It’s like a superhero recycling squad! Plus, in big waste systems, they help break down all the yucky waste, making useful stuff like compost or even biogas. It’s like turning garbage into something really helpful for the environment.
These little creatures are like superheroes against pollution! Some of them have these cool powers to break down bad stuff like oil spills or chemicals in the soil. So, they’re like the cleanup crew for our planet, making sure our environment stays healthy and safe.
Challenges and Conservation:
Threats:
Decomposers face several threats in today’s environment. Habitat destruction, caused by deforestation and urbanization, disrupts their ecosystems, leading to a decline in their populations. Additionally, pollution from chemical pesticides and fertilizers can adversely affect decomposer communities, hindering their vital role in nutrient cycling and soil health. Climate change-induced alterations in temperature and rainfall patterns further impact their habitats, posing a risk to their survival.
Conservation Efforts:
Various conservation efforts aim to protect decomposer populations and their habitats. Initiatives promoting sustainable land management practices prioritize maintaining healthy soil ecosystems, fostering the growth of decomposer populations. Educating communities about the significance of preserving these organisms and their habitats helps raise awareness about their crucial role in maintaining ecological balance. Implementing regulations that limit the use of harmful chemicals and support eco-friendly practices also contributes to safeguarding decomposer communities and the ecosystems they support.
Conclusion:
Decomposers are the unsung heroes of our ecosystems, performing invaluable tasks that ensure the sustainability and health of our environment. Their role in recycling nutrients, enriching soils, and facilitating waste management is critical in maintaining a balanced and thriving ecosystem. Despite facing challenges such as habitat destruction and pollution, efforts in conservation and awareness are essential to protect and preserve these tiny but mighty organisms. Recognizing and valuing the role of decomposers is crucial for sustaining biodiversity, soil health, and the overall well-being of our planet.
FAQs:
How do decomposers help in Mcq?
Decomposers serve as nature’s cleaners, breaking down deceased plants and animals. They aid in nutrient recycling and create room for new life in the biosphere by decomposing the deceased organisms.
Are decomposers helpful to plants?
Decomposers support plants by breaking down organic matter, which was once alive, and releasing nutrients into the soil. These nutrients become available for the plants growing in that soil to absorb and utilize for their growth.
Related Articles:

Optimize your check-signing process with signature stamps designed specifically for checks. Experience efficiency and security in one simple tool.
The domain of signature stamps goes beyond mere simplicity, holding deep importance in both personal and professional fields. These instruments are crafted to replicate signatures swiftly and reliably, fostering convenience and dependability. In this discourse, we delve into the multifaceted domain of signature stamps, encompassing their categorizations, applications, pre-purchase considerations, operational efficacy, potential limitations, and associated risks.
Varieties of Signature Stamps:
Pre-inked Signature Stamps:
These stamps feature an integrated ink reservoir within the stamp pad, ensuring consistent and lucid impressions.
Self-inking Signature Stamps:
Equipped with an internal ink mechanism that replenishes ink after each use, these stamps cater excellently to frequent applications.
Rubber Stamp Signature Stamps:
Traditional in nature, these stamps necessitate a separate ink pad while offering adaptability in terms of customization.
Utilizations and Implementations:
The application spectrum of signature stamps spans diverse domains:
Commercial and Corporate Utility:
Facilitating paperwork streamlining, document endorsements, and personalized correspondence augmentation.
Personal Integration:
Simplifying tasks such as check endorsements, document signing, and letter authorization.
Legal and Administrative Utilization:
Ensuring uniformity and expediency in administrative undertakings and legal documentation authentication.
Pre-Purchase Considerations:
Before committing to a signature stamp acquisition, it is imperative to contemplate:
Imprint Quality Assurance:
Ensuring the stamp yields legible and coherent impressions consistently.
Endurance and Longevity:
Opting for stamps fashioned from resilient materials capable of withstanding recurrent usage.
Customization Parameters:
Selecting stamps that accommodate customization of signature designs and supplementary text.
Compliance with Legal Precepts:
Familiarizing oneself with legal stipulations concerning signature stamp usage within one’s jurisdiction.
Operational Guidelines for Signature Stamps:
To maximize the efficacy of signature stamps, adhere to the following guidelines:
- Adequate Handling and Safekeeping:
- Store stamps in secure confines and handle them judiciously to avert potential damage.
- Imprint Clarity Assurance:
- Apply uniform pressure during stamp deployment to engender sharp and distinct impressions.
- Integrity Maintenance Strategies: Safeguard stamps against unauthorized access and misuse to forestall fraudulent activities.
Potential Limitations and Risks:
While signature stamps epitomize convenience, they harbor inherent risks:
Forgery Vulnerability:
Unauthorized access to signature stamps poses the risk of perpetrating fraudulent activities.
Legal Ramifications:
Acquaintance with the legal repercussions of signature stamp utilization, particularly in contractual and official document contexts, is imperative.
Risk Mitigation Measures:
Implementation of security protocols, including access restriction and surveillance, is paramount in curbing potential misuse.
Conclusion:
In summation, signature stamps emerge as indispensable assets that streamline operational workflows, augment efficiency, and inject a personalized essence into documentation. By assimilating insights into their variants, applications, considerations, and attendant risks, individuals and enterprises can harness the transformative potential of signature stamps adeptly while avoiding associated pitfalls. Whether endorsing checks, validating documents, or optimizing administrative processes, signature stamps represent an ideal solution catering comprehensively to diverse signing requisites.
FAQs:
Are signature stamps legal?
Certainly, signature stamps commonly serve as a legally recognized form of authorization.
How do I get a stamp of my signature?
You can get a stamp of your signature by creating a digital image of your signature and ordering a custom stamp online or at a stationery store.
Can you use signature stamps on checks?
Certainly, signature stamps can typically be used to sign checks, but it’s essential to take precautions. Individuals should update bank records to validate the use of stamps and closely control access to prevent any misuse.
Read Also:
Pros and Cons of BYOD: Opportunities and Risks For Companies

Watermelon is a must-eat fruit in summer. It is cool, juicy and sweet. Whether eaten directly or made into juice, it can bring a touch of coolness to the summer. However, there are many questions on how to choose a good watermelon based on its appearance. This is a major problem for consumers. Regarding this, the Agri-Food and Food Administration has personally revealed 5 tips so that everyone will never make a mistake when buying watermelon!
How to choose a watermelon?
Although it is difficult to define the ripeness of a fruit simply based on its exterior, there are still some ingenious ways to choose your Watermelon. We will reveal the secrets to you today!
Size and Shape
Good watermelons are generally medium sized, neither too small nor too large. The juiciest watermelons are generally heavier because they are full of water. The shape of a good watermelon is necessarily symmetrical or homogeneous: this indicates that it received a regular amount of water and sunlight during its growth. The presence of dents or cuts signals the opposite.
The Skin
This famous skin which prevents you from seeing the flesh inside to judge the condition of the fruit is, in truth, an indicator. And if we have to remember just one thing, it’s that a beautiful, unblemished watermelon will never be the best. The yellow spot present on watermelons is one of the most important criteria. This stain is completely normal: it forms on contact with the ground. The more yellow or orange this spot is, the darker it is, the tastier the watermelon will be. If the spot is white, it indicates that the fruit was harvested too early.
The gray traces, like spider webs, also guarantee a good sweet taste. In fact, these traces are a sign that the bees have come in large numbers to forage on the watermelon . And if these came, it was because the fruit was very sweet. Of course, this can be annoying for recipes where you have to use the skin of the watermelon (because yes, everything is eaten in the watermelon). You will then have to make a choice based on your needs. Finally, the skin of a watermelon should have a matte appearance and be a deep green color. The shine means it is not yet mature.
Touch the stem of the watermelon to identify a ripe fruit
The stem of a watermelon is also a good way to know its ripeness. A very green tail indicates that the fruit was harvested too early. Conversely, a very dry stem is a sign that the watermelon has reached a good level of maturation and is ready to be enjoyed.
Identify a good watermelon by tapping it
Watermelon fans have a special trick for recognizing a good fruit : it involves tapping the skin with your fingers. If the watermelon makes a full, tenor sound, it is ready to be eaten. Conversely, a deep or hollow sound means the fruit is unripe. The difference may seem small, but fruit lovers always get there in the end.
How to store it?
The best is to keep it in the refrigerator!
Unopened, you can easily store your watermelon for a week, preferably in a cool, well-ventilated place. If, on the contrary, it is already started, protect its flesh with cling film to prevent it from getting damaged and drying out.
And there you have it, thanks to these tips you will become a pro when choosing your Watermelons.
FAQs
How to choose a delicious watermelon?
Because as the watermelon matures, a large part of the water content will be expelled and more sugar will accumulate, so the weight of the mature watermelon is always lighter. So choose lighter watermelons of the same size. To sum up, when choosing a watermelon, you should choose one with a small navel, a curved base, clear lines, a crisp and vibrating sound when struck, and a light weight. Have you learned this?
What to do with unsweetened watermelon?
Methods/steps: Cut the watermelon into even and unequal portions, and sprinkle some salt and sugar on top . This will change the original tasteless taste of the watermelon from the outside. It is also a way to eat it, but before doing so, it is best to put the watermelon in the refrigerator. Freeze it and make it again, it will taste better.
Read Also:
Are you wondering when can chicks go outside? Raising chicks in a brooder cage is an exciting experience, but deciding when you can transfer them to the outside world can seem complicated. As with most projects we undertake, timing is essential! We have simplified the transition of chicks from a brooder cage to their permanent henhouse and enclosure. With a comfortable henhouse and well-respected good practices, you will find the right time and the right way to bring your chicks out safely.
WHEN CAN CHICKS GO OUTSIDE SAFELY?
If your chicks have been with you since they hatched, or if you got them shortly after, you probably remember how soft and fluffy (and cute) they were. However, these feathers which give the chick its downy appearance do not stay in place for long. You will soon notice that your once fluffy chicks are starting to look a little disheveled. This perfectly normal (although unsightly) phenomenon is simply the process of growing your pet’s adult feathers. Generally, these adult feathers should begin to appear between 7 and 14 days of age. Many factors determine how quickly these adult feathers will grow:
- Breed
- Food
- Temperature
- Care
Once you notice adult feathers growing on your chicks, begin to gradually lower the temperature in their brooder cage. Reduce the heat by 3 to 4°C each week until the brooder cage temperature is equal to room temperature. This gradual decrease in temperature will further facilitate their transition to the outside environment.
When your chicks reach 5 weeks of age, they have officially entered their “adolescence phase.” They may sport a convincing set of adult feathers, but like most adolescents, they’re not quite mature for the outside world! When chicks reach 6 to 8 weeks of age, it’s time to consider letting them out of the brooder cage and taking them on short, supervised excursions outside.
3 ESSENTIAL FACTORS TO CONSIDER BEFORE PUTTING YOUR CHICKS OUTSIDE
To help you determine if your chicks are ready to spend some time outdoors, you should ask yourself the following questions:
- Do my chicks have all their adult feathers?
- Is the outside temperature above 15.5°C?
- Do they have a perfectly enclosed space?
When your chicks are fully clothed in their adult feathers, they can withstand temperatures down to 15.5°C. Sunny days are always best for bringing your chicks outside and they must stay dry in order to be able to regulate their body temperature. A fully enclosed chicken run is essential for introducing them to the outside world, especially if you can’t stay with them for the duration of the excursion.
TEMPERATURE AND CLIMATE CONSIDERATIONS
Timing is everything when you need to move your chicks from the brooder cage to the coop, but if your chicks are at least 6 to 8 weeks old, they will be able to handle colder temperature drops. If you have a chicken tractor or a removable chicken coop, move your chicks according to the sun to help them transition from artificial heat to natural heat. And if your area experiences frequent weather swings during the colder months, you can add an extreme temperature thermal blanket to your chicks’ coop to ensure they stay warm during the night when they will be the most vulnerable.
If you let your chicks outside during the warmer months, a raised coop will provide them with additional shelter and shade. Like adult hens, chicks can suffer from heat stroke when temperatures are too high. So make sure they have plenty of fresh water and add a protective tarpaulin to their enclosure so that they have enough shaded areas at their disposal.
PROTECTING CHICKS FROM PREDATORS
When your chicks spend a lot of time outside, you don’t have the ability to constantly monitor them. It is therefore essential to install a secure henhouse for them with a large predator-resistant enclosure in order to protect them and accustom them to the outside world. Chicken predators are mainly active at night, but some will not pass up the opportunity to grab a few chicks during the day.
It is important to note that chicks are particularly vulnerable to snakes and raccoons which can slip under enclosures or pass their paws through wire mesh. For added security, wrap the bottom four feet of your enclosure with wire mesh to protect your chickens from these predators.
If your chicks are overstimulated, give them several places to “hide.” Opt for simple structures, such as upturned cardboard boxes with cut-out entrances or other homemade shelters. Even if your chicks aren’t big enough to use all of the chicken perches, the Omlet Standing Perch has easily height-adjustable perches that will allow your chicks to practice climbing.
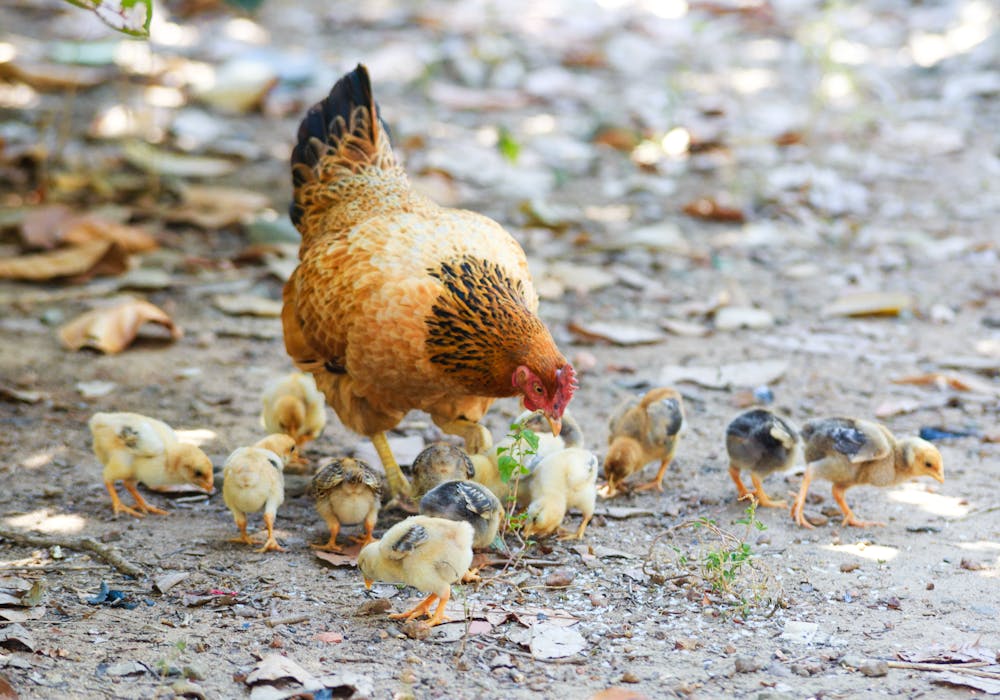
MOTHER HEN
Some chicks are born and raised naturally by their mother. Chickens can “broody” at any time of year, but it is usually in the spring that they attempt to hatch their eggs . If your hen goes brooding in winter, it is best to discourage her by collecting her eggs every day, as chicks born in winter will have a more difficult time than those born in warmer months. If your area experiences mild winters, your chickens will be able to keep their chicks warm even in temperatures below zero degrees. However, you will need to ensure that the chicks are not left unsupervised for too long when their mother hen goes to eat or drink.
Nature takes its course when chicks are raised by a hen. The hen provides heat even after her chicks hatch, making her a “broody” hen. Good mother hens instinctively know how long their chicks can tolerate the absence of this heat and will help their young adapt to the ambient temperature.
If your hen has been hatching chicks in an elevated coop, consider moving the hen and her chicks to a walk-in coop to prevent the chicks from accidentally falling while following their mother. You can also remove the chicks from the hen once they are dry and place them in a chick brooder cage.
TAKE THE CHICKS OUT DURING THE DAY
If you have gradually reduced the temperature of your chicks’ brooder cage, they should be able to be comfortable outside with temperatures dropping to 15.5°C, when they are 6 years old. at 8 weeks. To make outdoor excursions with your chicks successful, choose warm, sunny days. Start with short outings in a chicken run and then let them jump and scratch.
Every chick is different, but expect there to be some hesitation or uncertainty, especially at first. The feel of grass under their paws is very different from that of straw, shavings or the floor of their breeding cage. The outdoors offers lots of sights, sounds and smells that are unfamiliar to chicks raised in brooder cages. So start with short outings to avoid overstimulating them. Try taking them out for 10 to 15 minutes once or twice a day to help them build confidence. Stay close by their side during these first excursions to see how they react to their new environment.
After several days of short outings, increase the time spent outdoors by 10 to 15 minutes every other day, taking the weather into account. Before long, your chicks will spend several hours of the day getting used to their future forever home. If you haven’t already, now is a great time to start letting your chicks out of their coop and run.
CHECKLIST FOR THE PERMANENT TRANSFER OF CHICKS OUTSIDE
Do your chicks have all their feathers, have managed to get used to the outdoors to integrate into their new home and are perfectly happy? It’s time to take the next step! Make sure the following items are in place before permanently moving your chicks outside:
- A secure , comfortable and easy-access henhouse for your chicks
- An adjoining enclosure reinforced with additional protection against predators
- Feeders and drinkers placed at heights suitable for your chicks
- Outdoor temperatures greater than or equal to 15.5°C, even at night
- Chicks at least 6 to 8 weeks old
If you are transferring your chicks to an Eglu chicken coop, the recommended age is 12 weeks. This gives them enough time to grow to a size suitable for the Omlet chicken coop design. The coop’s perches and ladders can be a challenge for chicks younger than 12 weeks, and the spacing of the steel wire in the chicken wire was designed for larger chicks.
CAN MY CHICKS LIVE OUTSIDE WITH OTHER CHICKENS?
If your chicks join other hens, follow the same steps as integrating new hens into an existing group. Quarantine periods do not apply to chicks that you have raised yourself in a brooder cage, as you would have noticed any signs of illness during this period. However, it is best to introduce chicks to their future breeding companions slowly to minimize the risk of injury. You can place a chicken run inside or next to your current chickens’ setup for a safe first contact.
As always, hens will need to establish a hierarchy within their group, regardless of how many times they have seen the chicks through a fence. Always monitor the first meeting when introducing new members to a group. Quickly remove chicks that hens seem to be attacking and consider housing them separately, as well as overly aggressive hens, until your chicks are older.
THINGS TO TAKE INTO ACCOUNT BEFORE PERMANENTLY MOVING YOUR CHICKS OUTSIDE
Most chicken keepers agree that spring and early summer are the best times to bring chicks outside. However, some climates can experience bitter cold for more than half the year, which can make raising chicks in the spring a little more complicated. In this case, it is best to keep your chicks in their broader cage for as long as possible, ideally until they are 12 to 16 weeks old. If your chicks are too big to stay in their brooder cage for that long, be sure to take extra precautions against the cold. Prepare your chicks’ coop and run for winter as you normally would for adult chickens. In particular, you can install an Eglu hen house to keep your birds warm, and consider adding a weather proof tarpaulin to your henhouse to reinforce its insulation.
HOW DO I KNOW IF MY CHICKS ARE TOO COLD?
You should watch out for the same signs as for adult chickens. Check your chicks regularly and look for the following signs to determine if they are too cold:
- Lethargy
- Grouping against each other
- Standing with one paw off the ground
- Discoloration of crests, wattles or feet
If you notice any of these symptoms in your chicks during cold weather, bring them indoors quickly. Do not warm them up too quickly or they may go into shock. Use a heat lamp only if their indoor space is in a drafty area, such as a garage or large. A temperature above 18°C will be enough to slowly warm overly chilled chicks. Keep them indoors until they are eating and drinking normally, and plan to let them outside again when outside temperatures are more stable.
WHEN SHOULD YOU AVOID LETTING YOUR CHICKS OUT?
Under certain conditions, chicks should not go outside, particularly in the following cases:
- If your chicks are under 6 weeks of age,
- If your chicks are under 12 weeks of age and temperatures drop below freezing,
- During heavy rain or extreme weather conditions,
- If your chicks can’t easily reach their coop.
Always check the weather forecast to get an idea of temperatures and precipitation during the week you plan to move your chicks outdoors permanently. If heavy rain is expected, or any other significant weather event, postpone transferring your chicks until conditions improve. Wet chicks, like their adult counterparts, have difficulty regulating their body temperature.
While some chicks quickly become familiar with the henhouse ladder, others have more difficulty perfecting this technique. If you notice that some of your chicks are unable to use the ladder, create a ramp and place it on the rungs of the ladder. Once they get used to using their growing paws, you can remove the ramp.
Finally, don’t forget to consider the bird flu situation in your area. Chicks are at the same risk of catching it as adult chickens, but by adding a protective tarp over your chickens’ enclosure, you can greatly minimize this risk by protecting them from wild bird droppings.
Read Also:
-
 Top2 years ago
2022 US House committee releases Trump’s tax returns, capping a years-long battle
-

 News1 year ago
USPS EMPLOYEE ASSISTANCE PROGRAM SERVICES AND BENEFITS
-

 Top2 years ago
Interview With Niantic CEO John Niantsullivan
-

 Top1 year ago
Understanding the Healing Process of Nose Piercings – A Comprehensive Guide
-

 Auto1 year ago
Top Porsche Taycan Incentives: Save Big
-

 Business12 months ago
Does 7-Eleven Take Apple Pay
-

 Business11 months ago
Beware Of Fake Emails And Fake Apple Pay Images
-

 Tech1 year ago
USPS LiteBlue ePayroll: A Comprehensive Guide